MDL Quickstart
You can use Vault API to modify metadata and manage configurations for Vault.
This tutorial walks through the process of using MDL to modify configuration in Vault. You'll use MDL to do the following:
- Create a basic Picklist component.
- Create a vMDL Hello World Vault object that uses the Picklist.
- Simultaneously alter the object and Picklist.
- Drop both the object and Picklist from the Vault.
To use and test out MDL, we recommend downloading our Postman collection and using a sandbox Vault, which is a copy of your production Vault. Learn more about Vault Sandboxes in Vault Help
This collection allows you to execute the basic commands laid out in the steps below and verify the results in your Vault. Click the button below to import the collection into Postman.
Execute MDL Commands
Section link for Execute MDL CommandsTo execute a MDL command, send a POST request to the Execute MDL Script endpoint.
curl -X POST -H "Authorization: {AUTH_VALUE}" \
-H "Content-Type: application/json" \
--data-binary @"mdl.txt" \
https://myvault.veevavault.com/api/mdl/execute
You can execute MDL commands one at a time or in a script. When executed as a script, MDL executes each command sequentially.
Step 1: Create a Picklist
Section link for Step 1: Create a PicklistYou'll first need to create a Picklist for your Vault. The following example creates a single Picklistentry in the Picklist component. Learn more about the MDL Picklist component.
-
To create a picklist named
vMDL Options, enter the followingRECREATEcommand:RECREATE Picklist vmdl_options__c ( label('vMDL Options'), active(true), Picklistentry hello_world__c( value('hello world'), order(0), active(true) ) ); -
Navigate to Business Admin > Picklists to confirm that the vMDL Options picklist exists in your Vault.
Step 2: Create an Object
Section link for Step 2: Create an ObjectNow that you've created a Picklist, you're ready to create a Vault Object that uses the picklist. Learn more about the MDL Object component.
-
Enter the following
RECREATEcommand:RECREATE Object vmdl_hello_world__c ( label('vMDL Hello World'), label_plural('vMDL Hello World'), active(true), description("This is sample object created for the MDL 'Getting Started' guide."), help_content(), in_menu(true), allow_attachments(false), enable_esignatures(false), audit(false), order(0), dynamic_security(false), system_managed(false), available_lifecycles(), object_class('base'), allow_types(false), user_role_setup_object(), Field option__c( label('Option'), type('Picklist'), active(true), required(false), unique(false), list_column(false), order(14), multi_value(false), picklist('Picklist.vmdl_options__c')) ); -
Log in to your Vault.
-
Navigate to Business Admin > Objects to confirm that the vMDL Hello World object exists in your Vault.
Step 3: Create an Object Record
Section link for Step 3: Create an Object RecordNow that you've created the necessary components, you'll want to create a vMDL Hello World object record in your Vault.
You can do this with the Postman collection or manually in the Admin UI.
-
Log into your Vault.
-
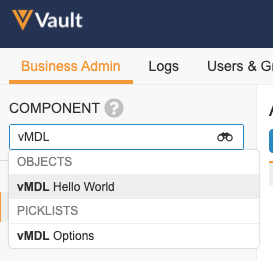
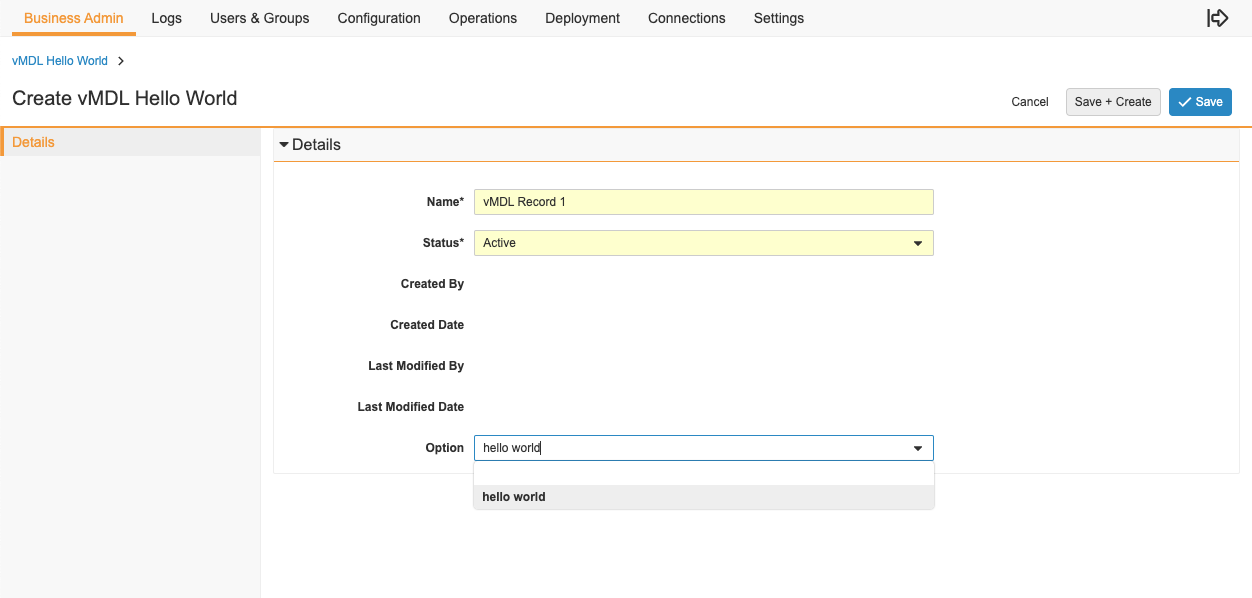
Navigate to Business Admin > Objects > vMDL Hello World.
-
Click Create.
-
Enter a Name for the object record.
-
Select hello world from the Option picklist.
-
Click Save.
Step 4: Alter the Object and Picklist
Section link for Step 4: Alter the Object and PicklistNext, you'll use a single statement to modify both the Object and Picklist simultaneously.
-
Enter an
ALTERcommand to add a second picklist entry and modify the initial entry. You should manually enter a value before running the MDL command for the new picklist entry's value.ALTER Picklist vmdl_options__c ( label('vMDL Options'), MODIFY Picklistentry hello_world__c( value('Hello World.'), order(0) ), ADD Picklistentry hello_worldv2__c( value('ENTER ANY VALUE'), order(1), active(true) ) );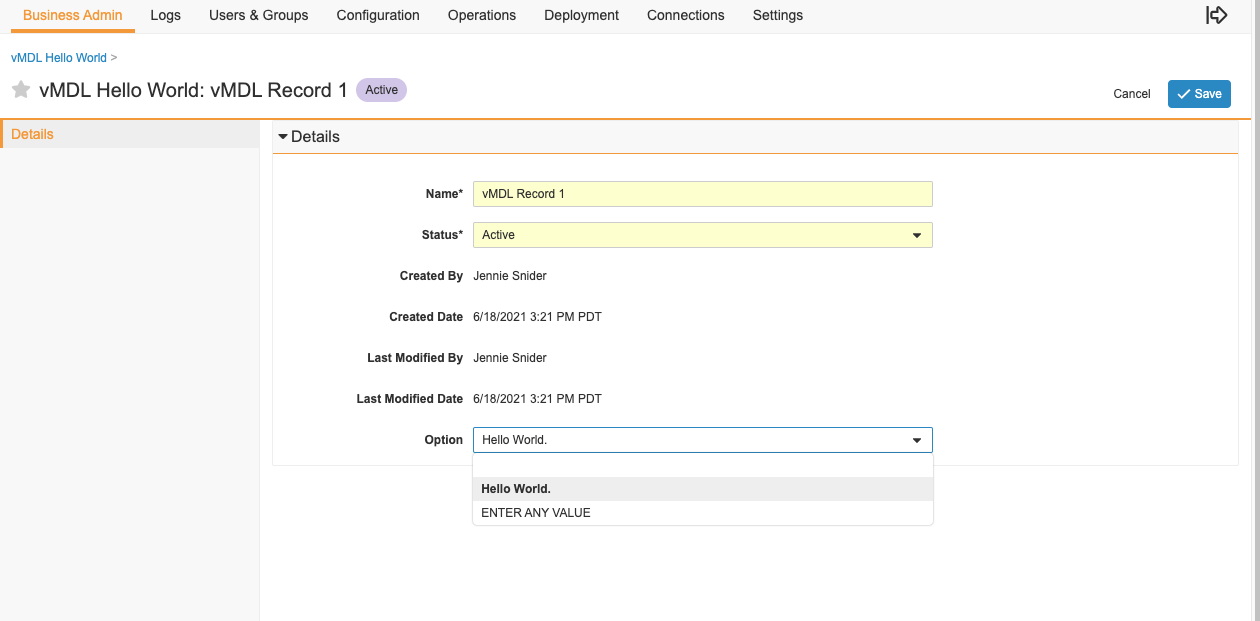
-
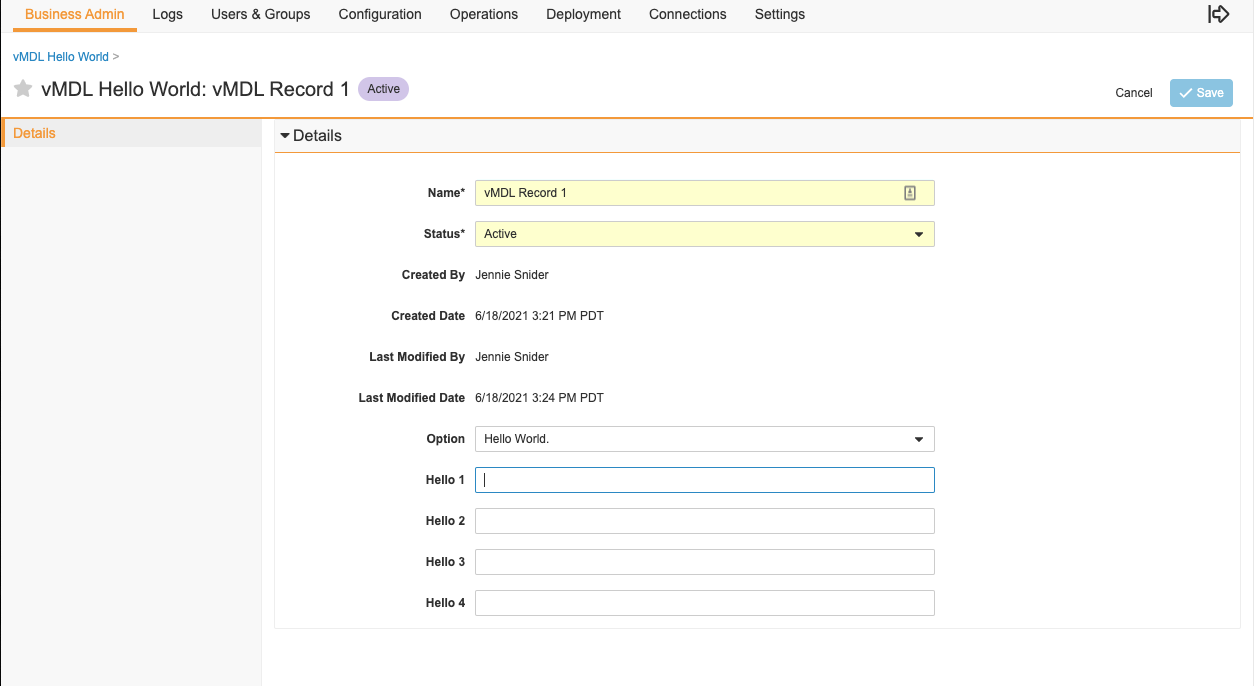
Use the
ALTERcommand to add four new object fields.ALTER Object vmdl_hello_world__c ( ADD Field hello1__c( label('Hello 1'), type('String'), active(true), required(false), list_column(false), unique(false), order(0)), ADD Field hello2__c( label('Hello 2'), type('String'), active(true), required(false), list_column(false), unique(false), order(0)), ADD Field hello3__c( label('Hello 3'), type('String'), active(true), required(false), list_column(false), unique(false), order(0)), ADD Field hello4__c( label('Hello 4'), type('String'), active(true), required(false), list_column(false), unique(false), order(0)) );
Step 5: Create an Object Record with New Fields
Section link for Step 5: Create an Object Record with New FieldsReturn to your Vault to create a new vMDL Hello World record. You will see the new picklist entry options as well as the four new fields on the object record.
You can do this with the Postman collection or manually in the Admin UI.
-
Log into your Vault.
-
Navigate to Business Admin > Objects > vMDL Hello World.
-
Click Create.
-
Fill in the record information: Name, Hello 1 - 4, and Options fields.
-
Click Save.
Step 6: Delete the Object Records
Section link for Step 6: Delete the Object RecordsNow that you have created vMDL Hello World records with the original and altered fields, you can delete the object records.
-
Log in to your Vault.
-
Navigate to Business Admin > Objects > vMDL Hello World.
-
From the Actions menu, click Delete.
Step 7: Drop Picklist and Object Components
Section link for Step 7: Drop Picklist and Object ComponentsTo delete both the object and picklist components, use the DROP command. Note that you must delete the object records to delete the components.
DROP Object vmdl_hello_world__c;
DROP Picklist vmdl_options__c;