Setting Up Postman & Postman Environments
Prior to sending requests to Vault API, you must set up Postman with your desired version of the Vault Platform Postman Collection and prepare an environment.
Importing Collections
Section link for Importing CollectionsTo import the Vault Platform Postman Collection:
- Create a Postman account
. - Download the Postman
desktop app. - Download the Vault Platform Postman Collection from your applicableGAversion of the Vault API Reference by selecting Run in Postman in the lefthand sidebar, then clicking the Run in Postman button. Postman collections are available for Vault API versions v20.2+.
- Drag and drop the downloaded
.jsonfile into your Postman desktop app to import the collection. Alternatively, you can click () > Import. 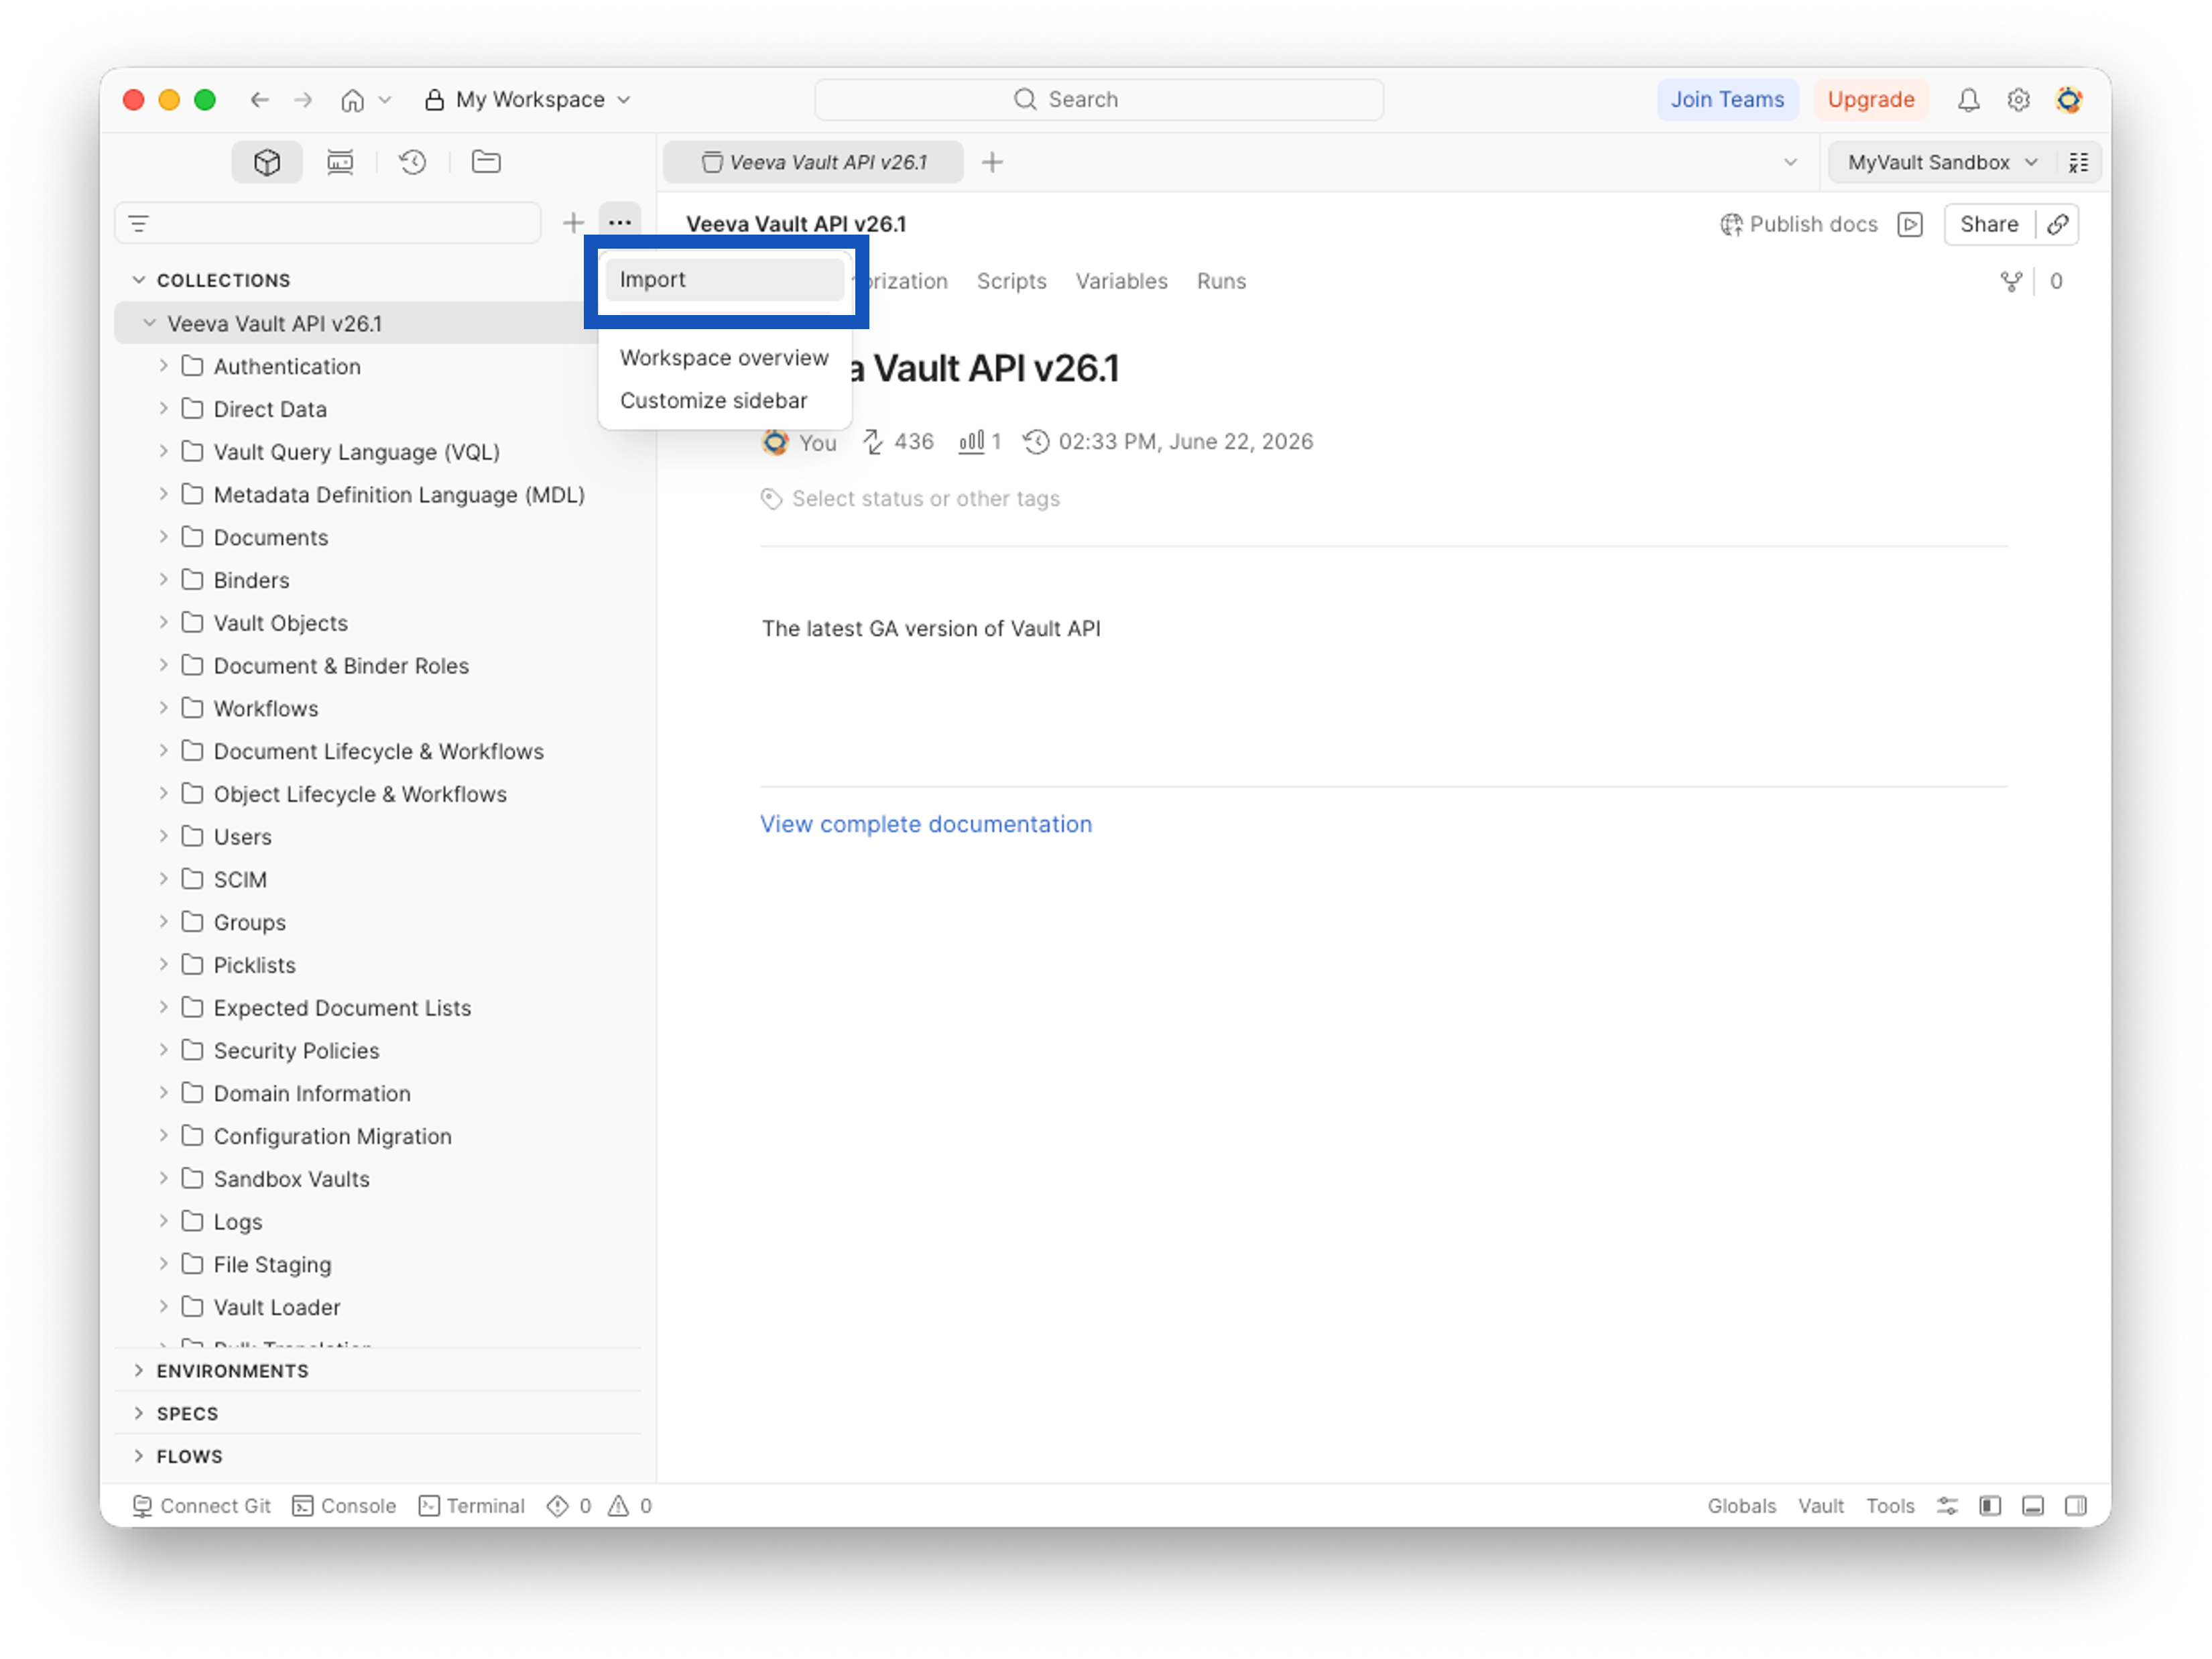
Once imported, the Vault Platform Postman Collection appears in the lefthand sidebar beneath Collections. Click the name of a specific Postman Collection or its folders to expand or collapse the content nested within the collection.
Using Environments
Section link for Using EnvironmentsEnvironments are reusable sets of stored variables that Postman references when you send requests to Vault API. For example, when sending a request, instead of indicating the vaultDNS and version as path parameters in Postman, you can store these variables and their values in an environment named after a specific Vault. Learn more about managing environments in the Postman Docs
Download the sample Postman environment we've provided below or continue to the next section to learn how to create an environment.
Creating an Environment
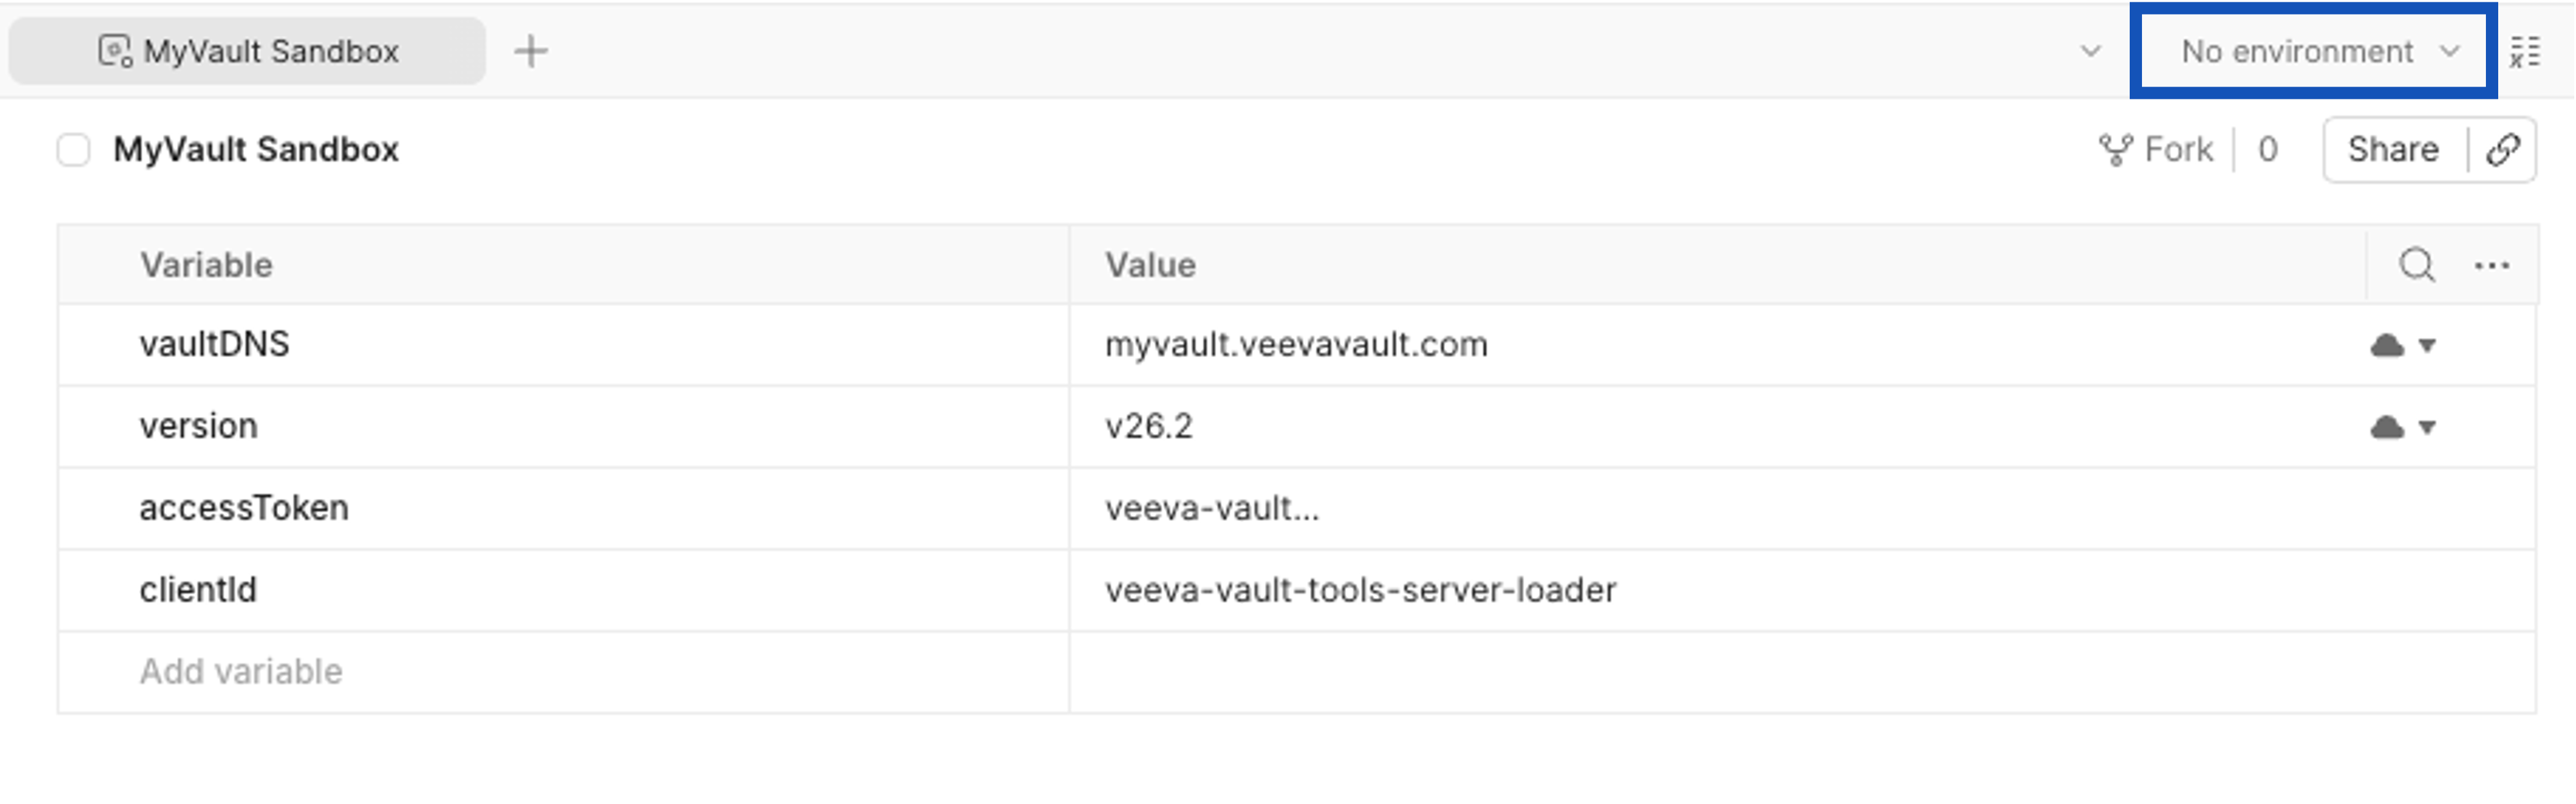
Section link for Creating an EnvironmentTo create an environment for a specific Vault:
- In Postman, click (
), then select Environments. - Populate a name for the environment. We recommend naming the environment after the name of your Vault.
- Populate a Value for each of the following variables:
vaultDNS: The DNS of your Vault. For example,myvault.veevavault.com.version: The Vault API version. For example,v26.2.accessToken: Your API access token, beginning withveeva-vault-followed by a randomized string.clientId: The optional client ID for tracking purposes. For example,veeva-vault-tools-server-loader.
Postman automatically saves any changes to these variables. To activate this environment prior to sending calls to Vault API, select No Environment from the top right, then select the environment you created.
Switching Environments
Section link for Switching EnvironmentsA single environment can be active at a time, denoted by a
To set an environment as active, hover over its name in the lefthand sidebar and select